Quantcast
Channel: Lori McNee – Fine Art & Tips
Viewing all 273 articles
Browse latest View live

Drawing Lines Using the Indentation Method

$
0
0

Drawing Lines Using the Indentation Method

As an artist, I am always learning with each new piece I create. Recently I learned of a new technique for drawing light lines (in this case, for whiskers) against a dark background that I would love to share.

A common challenge I face in pencil drawing as opposed to acrylic painting is getting crisp, white lines (such as hair or whiskers) over a dark background. While in painting this can be achieved by using light paint on top of the background, with pencil you cannot draw white on top of black; the only white available is the paper showing through.

In the past, I have drawn white whiskers by lightly sketching the outline of the whiskers, then shading in the negative spaces. Although this is a helpful technique that has its place, I find it can be quite time consuming and tedious. I’ve also tried using a sharpened eraser to create white whiskers, but I cannot get them fine enough or bright enough.

In the tiger drawing below, you can see an example of using negative space line drawing.

Drawing Lines Using the Indentation Method

Example of ‘negative space’ drawing technique

However, I find the “new” indentation method a lot quicker and easier, and it makes wonderful, fine, sharp lines.

Here’s how it works:

  • It involves simply indenting the paper deep enough so that your pencil skips over the “valley” as you shade, leaving you with a crisp, white line.
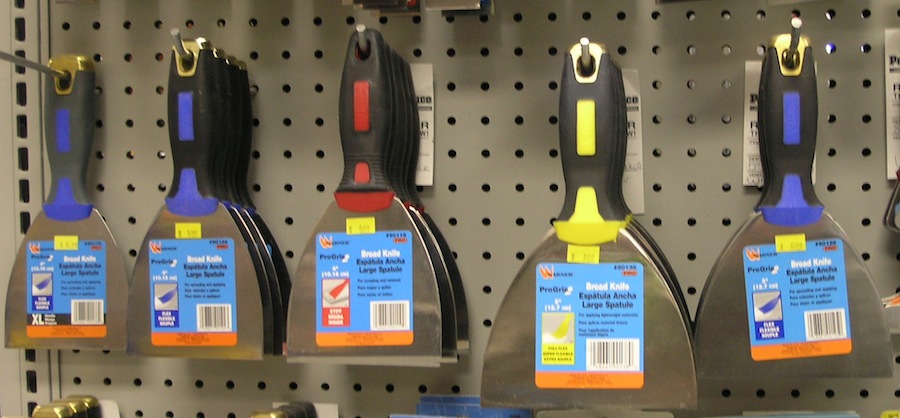
  • This can be achieved with any pointy, but rounded object, such as an EMPTY ball point pen, a stylus, knitting needles, or even your thumbnail.
  • Experiment with different tools to see what you like best. The goal is to be able to indent the paper but not shred or tear it.
  • When shading over the little “valley”, be careful not to use a very sharp pencil, as it might fall into the indentation rather than skip over it. Also, do not shade in the same direction as the indented line, as again you could shade into the indentation.

 Drawing Lines Using the Indentation Method

A word of caution in using this method: it CANNOT be erased once you make the mark!

  • So be sure to practice, practice, practice.
  • It might help to lightly sketch with a pencil as a guide, then indent BESIDE the pencil marks (not on top or else you will press the pencil mark into the paper, making it difficult to erase).
  • With the indentation method, it is also very important to press firmly, but also quickly and smoothly.
  • The last thing you want to end up with is a shaky permanent line.

Although I find this method most helpful for drawing whiskers, play around with it making a variety of different marks, from lines to dots. Also experiment with different papers. Have fun!

So there you have it, drawing lines using the indentation method! I hope it’s as helpful in your pencil drawing as it has been for me.

Guest artist/author: Canadian artist, Nikki Toews is passionate about animals and nature and loves to create art centered around these themes. She also specializes in custom portraits and commissions. You can find her on Facebook or her website.

***Thanks to Nikki for sharing a valuable art tip! And thank YOU for visiting FineArtTips.com. You can meet me on my social media sites > Fine Art Tips Facebook Fan Page, on Twitter, Google Plus and on PinterestBe sure and check out and my fine art prints and notecards on Fine Art America.  Or see my art on my website,  LoriMcNee.com.  ~Lori

Originally published on http://finearttips.com


How a Young Artist Sold 400 Paintings in One Year

$
0
0

They all said I was crazy. My family begged me not to do it. My friends laughed and said I wouldn’t last a month. Luckily, I didn’t listen to any of them and chased my dream of being a successful full-time artist. Here’s my story of how I sold 400 paintings in one year…

How a Young Artist Sold 400 Paintings in One Year

After graduating from art school with a degree in illustration, I was at a standstill and didn’t know how to dive into the art industry. Back then, I was still living in Laguna Beach, CA, so I decided to try my hand at plein air painting. This was something I had only done once or twice before, and with little success.

After a week I was hooked! I fell in love with the work of Edgar Payne, William Wendt and the likes, and at that moment I knew this was what I wanted to do with my life. I told my friends and family that I would not be going into the field of illustration, but literally into the field to paint from life, in plein air.

How a Young Artist Sold 400 Paintings in One Year

After one month of literally painting every day, from sunrise to sunset, I was selling here and there, mostly right off the easel, but I quickly burned through my savings, and soon after, lost my apartment and moved into the comfort of my car parked along the Pacific Coastline. My family tried sending me money but I always refused.

I knew this was what I wanted more than anything. I was determined to make it work. A few more months passed, and things got a bit rougher. I was underfeed and had no gas to move my car, not a dollar to my name, but I kept painting.

On my last stretch of energy, with a dozen paintings laid out by my feet in South Laguna with a ridiculous sunburn and hungry belly, a woman walked by, complimented my work and then bought all of my paintings!

She went to the bank and came back with over a grand in cash, and then took me out to lunch. Turns out this woman, who I remain friends with to this day, was an avid art collector. Then she generously gave me a show in her home a couple weeks later. I nearly sold out at the show and then I got picked up to be represented by a prominent gallery in Laguna Beach the following week.

How a Young Artist Sold 400 Paintings in One Year  This was back in 2008 and six years later, I’m painting more than ever.

Last year, I sold over 400 paintings. Mostly small ones, and a few large ones. I will still pick up an illustration job from time to time, but painting plein air is what I love more than anything – this is how I spend my time. I am represented by a couple galleries here in Oregon, but I do most of my sales through my website, which is updated daily.

I was very fortunate to get noticed soon after graduating art school. But, I also know that I would have never made it if I didn’t give it everything I had.

Painting out on location, every single day for several years, has allowed me to make leaps and bounds in my painting skills. It’s also allowed me to network with so many people that I would meet on a daily basis while out in the field. I believe you have to put yourself out there, be vulnerable, be honest, and never stop painting.

Guest artist/author: Since graduating from Laguna College of Art & Design in 2007, Jonathan Luczycki (Lou-ziss-key) has painted outdoors nearly everyday. As of September 2012, Jonathan currently resides and works as a full time painter in beautiful Portland, OR.

*****

Recently, I had the pleasure of meeting Jonathan in Monterey at the 3rd Plein Air Convention. His story and magnanimous personality stole the show! Jonathan has the personality, drive, and passion to succeed. I look forward to keeping tabs on his career! ~Lori

You can find more great tips on Fine Art Tips Facebook Fan Page, on Twitter, Google Plus and on PinterestBe sure and check out and my fine art prints and notecards on Fine Art America.  Or see my art on my website,  LoriMcNee.com.  ~Lori

Originally published on http://finearttips.com

How To Paint An Awesome Deer

$
0
0

With over 80,000 likes on his Facebook page, my friend Tony O’Conner is a social media rockstar artist!

A very talented painter specializing in equine art, Tony captivates his following with beautiful art and tutorials like, How To Paint An Awesome Deer (it looks like and elk, but it’s a red deer).

I hope you enjoy his ‘how to paint’ tutorial below.

Step 1

Loosely sketch out the deer… and when I say loosely, I mean not loosely at all.. try and get it in proportion and try to draw the antlers looking evenly spaced/balanced on his head.

how to paint an awesome deer

Step 2

Stretch some linen over a 40″x40″ thick canvas stretcher/prime it with a clear gesso, and scale up your sketch to suit.

I use a willow charcoal very lightly to start with, as linen isn’t as forgiving as gessoed canvas. If you do this too heavily, it will leave a mark – and well, one does want ones linen looking immaculate once the painting part is done.. so this means being extra careful. The paint will also tend to stain the “negative space” that you want leave… so its a good exercise in patience and control…

how to paint an awesome deer

Step 3

Start slapping on paint… I prefer to start from the top down with this kind of piece, working from left to right, as I am right handed (can hold coffee cup in left hand, or have it hooked up intravenously).

how to paint an awesome deer

Step 4

Colour in-between the lines…Take a deep breath & stand back….

I shall leave this to dry for a few days before the fun begins with building up glazes & layers of translucent colour to hopefully give depth, form, structure and the ‘X’ factor to the piece!

how to paint an awesome deer

Guest author/artist: Tony O’Conner  is a top notch artist, joker and all round nice guy. From Ireland, he specializes in Equine, Canine, Cervidae, Bovine, Avian… no, not a Harry Potter spell…but what ya’ll find!

*****

You can find more great tips on Fine Art Tips Facebook Fan Page, on Twitter, Google Plus and on PinterestBe sure and check out and my fine art prints and notecards on Fine Art America.  Or see my art on my website,  LoriMcNee.com.  ~Lori


Originally published on http://finearttips.com

6 Great Art Blogs For Those Addicted To Learning

$
0
0

6 Art Blogs for Those Addicted to Learning

I’m addicted to learning. I grew up in a household where education is extremely important and success was achieved by studying and working hard at whatever you desire. This mentality has stuck with me all of my life. So, in my journey to become a good artist, I have to find resources, and art blogs for learning.

So, what do I look for in a art blog? Several things:

  1. Excellent artwork.
  2. Interesting ideas that I can adapt with using my current methods.
  3. The personality of the person and their writing style.
  4. Blogs that post on a regular basis.
  5. Blog postings that don’t take long to read.

There is so much information out there.  Art blogs that post once or twice a week are my favorites. It’s kind of like waiting for the next release of your favorite novel… you just want to see what happens next!

1) The Art Order (http://theartorder.com/)

This blog, run by Jon Schindehette, is an extremely popular blog among fantasy and sci-fi artists. He runs a monthly contest that features superb work by aspiring artists and judged by several well-known Art Directors in this genre. This is a great place to get your work noticed by other well-known artists. Also, he posts regularly about how to approach art directors, improve your level of work, creating a portfolio, etc. This last week, he posted a fantastic article about whether you are good enough to work for companies. For me, since I’m going more for the direct and gallery approach, a lot of what we says still apply. Am I good enough for a gallery? How should I create a portfolio to show a gallery?

2) James Gurney (http://gurneyjourney.blogspot.com/)

James Gurney, the creator of Dinotopia, is an amazing draftsmen, oil painter, plein-air painter and all-around unique individual. He has an absolute love of learning. His blog doesn’t just talk about art. He talks about anything related to art: how the eyes see color, how to create maquettes, how the eyes track around a painting, etc.

3) Stapleton Kearn (http://stapletonkearns.blogspot.com/)

Stapleton is a traditional oil painter who creates a lot of scenes of New England. I found Stapleton’s blog from a post in Gurney’s blog. Like Gurney’s blog, Stapleton’s site is HUGE. There are thousands of postings talking about how the older artists did their work, how to solve a lot of issues when painting outside in oils, etc. It is well worth going back to the beginning of Stapleton’s blog and start reading.

4) Lori McNee (http://www.finearttips.com/)

I don’t remember how I found Lori’s blog. She is another amazing artist with the ability to take mundane topics (marketing and branding) and make it interesting. Although she does a lot of oil paintings with birds and vases, I find that the way she handles landscapes to be truly stunning. Her blog has a lot of information about successful marketing of your art work and using the current methods of social media/branding to get your work out there. In addition to the marketing side, Lori talks quite a bit about her studio setup and how she goes about doing her work. I love that part. I love how to see how other artists approach issues and their solutions to overcome problems.

5) Chris Oatley (http://chrisoatley.com/)

Chris used to be a character designer for Disney Toon Studios before he went to create his own art academy (I took his Painting Drama 1 class and learned a lot). A lot of Chris’ postings are related to the new working artist and people who are trying to get into the industry. Since I have no interest in the animation industry, it doesn’t seem like this would be my thing. However, like everything else, the posts are generic. For example, he does a great job talking about how the over-rendering of a painting tends to become more important than the painting itself (This was a note for those who tend to think that detail is everything… which it is not. You need just enough detail to tell the story and not any more).

6) Muddy Colors (http://muddycolors.blogspot.com/)

Another blog about fantasy and sci-fi art. There are a number of great art directors/ book illustrators/fine artists that write stories for this blog. Topics range from how to talk to art directors (or gallery owners) to how to take pictures of your paintings to how to create thumbnails and compose the proper mood for your painting. It’s a great all-around blog that helps artists at all levels.

6 Great Art Blogs For Those Addicted To Learning

Dougie Hoppes

I can spend more time reading blogs, but, in reality, more time should be spent painting and drawing, not reading. Knowledge is great, but it doesn’t mean anything if you don’t spend the time at the easel to apply that knowledge.

Guest author/artist: Doug Hoppes  is a Vermont artist, who loves learning and painting the local landscapes. You can find him on Facebook too!

*****

Thank you Dougie for the great guest post, and for including me in your list of art blogs to follow! It has been exciting watching you grow as a painter. And…thank you for continued friendship and support on my FineArtTips Facebook page. ~Lori

You can find more great tips on Fine Art Tips Facebook Fan Page, on Twitter, Google Plus and on PinterestBe sure and check out and my fine art prints and notecards on Fine Art America. Check out my website,  LoriMcNee.com.  ~Lori

Originally published on http://finearttips.com

Meet Me At Oil Painters Of America National Exhibition 2014

$
0
0

Meet me at the 23rd Oil Painters of America Annual National Exhibition and Convention, being held in Bennington, Vermont, June 7 – July 27, 2014. I will be painting, and then speaking about, “Brand Building & Art Marketing Secrets Using Social Media and Blogging.” 

In April, I had a great time speaking and teaching at the 3rd Plein Air Convention in Monterey. Now, I hope to see some of you in Vermont!

Meet Me At The 23rd Oil Painters Of America National Exhibition

Everyone is invited to attend! Join us for a informative week filled with presentations, painting demonstrations, and networking opportunities that will inspire your artwork, art business and sharpen your skills.

An opening reception will be held for artists, collectors, the public and the press on Saturday, June 7 from 5:30 p.m. to 8:00 p.m. with the awards presentation taking place at 7:00 p.m. As has become our custom, many informative and educational seminars will be offered to OPA members and guests during the exhibition. 

Here are some highlights you won’t want to miss. (learn more about the event)

Presentations include:

  • “Road Trip” with Fine Art Connoisseur Magazine’s Editor-in-Chief, Peter Trippi
  • “How to Present Your Most Professional Self-Inspiring Ideas to Help Take Your Art To the Next Level” with Kristen Thies, CEO, West Wind Fine Art 
  • “Fluidity and Color” presentation and painting demonstration with Daniel J. Keyes
  • “Brand Building & Art Marketing Secrets Using Social Media and Blogging” with Social Media Expert, Lori McNee
  • OPA Distinguished Artist: “Up Close and Personal” with Alan Wolton OPAM and Editor-in-Chief of Southwest Art Magazine, Kristin Hoerth
  • “Breaking into the Field of Portraiture” a panel discussion with William T. Chambers OPAM, John Michael Carter, OPMA, Quin Ming, and Portrait, Inc. Executive Partners Julia G. Baughman and Ruth Reeves

Painting demonstrations by:

  • Juror of Awards Charles Movalli OPAM
  • Alan Wolton OPAM
  • Zhiwei Tu OPMA
  • Daniel J. Keyes
  • Lori McNee
  • Derek Peniz
  • Mary Qian

Fun Events:

  • American Art Collector Magazine’s “Quintessential Vermont ” Party
  • Southwest Art Magazine’s Pampered Paint-Out
  • Opening Reception & Awards Ceremony.

I hope to meet some of you there! ~Lori

*For a complete schedule of events, speaker and seminar details and other registration information, please visit: www.OilPaintersofAmerica.com 

Let’s also meet on Twitterand on Google Plus, Pinterestand join in the fun at Fine Art Tips Facebook Fan Page! Please checkout my art too LoriMcNee.com, or find me on Instagram lorimcneeartist.

Originally published on http://finearttips.com

Make Slideshow Videos For Instagram With PhotoGrid

$
0
0

Now it’s easy to make quick slideshow videos for Instagram with PhotoGrid.

For a while, I’ve been using the PhotoGrid app on my cell phone to make my photo collections into amazing collages for Instagram. But now with the addition of the video maker, I can quickly make a slideshow of my favorite images accompanied by music! I tested it out today. I even shared my slideshow to Instagram, Facebook and Youtube. I can’t wait to make more fun videos.

Check out my recent plein air painting adventures…

You can find more great tips on Fine Art Tips Facebook Fan Page, on Twitter, Google Plus and on PinterestBe sure and check out and my fine art prints and notecards on Fine Art America.  Or see my art on my website,  LoriMcNee.com.  ~Lori

Originally published on http://finearttips.com

How This Artist Earned Nearly 100,000 Facebook Page Fans

$
0
0

How This Artist Earned Nearly 100,000 Facebook Page Fans

Incredibly, within a few months my talented friend Tony O’Connor will reach 100,000 Facebook page fans.

Tony is an extraordinary artist and has the wit, charm, and humor to match his painting skills. But, his tips below will help anyone gain a loyal Facebook page following.

Here’s how to make your Facebook page, Tonylicious!

5 Tips on How To Have an Awesome Facebook Page That Promotes You, Your Art & Your Sales

1. INTERACTION

Facebook isn’t a “professional website” or “faceless corporation” type place. Facebook is supposed to be fun. It’s somewhere people come to waste a few hours when the boss isn’t looking, to watch videos about kittens, and ‘stalk’ old flames … or so I hear!

Basically, its people orientated! People want to connect with like-minded souls and YOUR art can do that.

“Ask your followers questions. Answer their questions (as much as you can) and build up your rapport with your fans.” ~Tony O’Connor 

Of course, relationships go two ways with both parties benefiting from the association.

Remember, this is your art business page! Do not rant, use swear words, or vent political, or religious views.

“It’s been proven that when people feel a connection with the artist, they are more likely to buy from that artist.” ~Tony O’Connor

By taking time to interact with your followers, at some point you will most likely sell to them – you want to be their go-to guy (or gal)!

2. DO NOT HARD SELL

Don’t just sell to sell. People mostly use Facebook to chill-out on, not to shop. If your fans feel like they are constantly being bombarded by sales pitches, you’ll find yourself losing them pretty quickly.

Sure, you need to sell. The whole object of having the page is to present and promote your work, and to actually make enough dough to keep you in canvases, and overpriced caffeine based beverages.

I suggest having albums with available works, a ‘notes page’ with info on commission work and anything you feel people need to know, like a FAQs category.

Facebook is pretty good for smaller value sales, say from €20-€200 (approx. $25.00-$275.00 USD) If you have products in this range, you can make a pretty snazzy income for yourself.  If you had nothing better to do … but hey, we’re artists, and we like to create stuff, so selling all day will bore you to death.

How This Artist Earned Nearly 100,000 Facebook Page Fans

Check this out! 933 shares & 3,004 LIKES on this post!

3. POST REGULARLY (and post relevant)

Unfortunately, Facebook settings/algorithms have kinda screwed things up for the smaller business pages. They get lost in the feed of pages paying to promote things.

Make sure your posts are regular and relevant to you. The regularity of the posts is one thing but the timing of when you post them is also key.

I like to post 2-3 times a day ensuring that followers in different time zones will get to see at least one of them.

Keep your posts relevant to your art at the start of building your page. This is key. Post your prep sketches, your works in progress – people like to see this. It’s sort of a behind the scenes peek, something that we’re not usually privy to and this has its appeal.

Cautionary note – I’m somewhat of a workaholic, so I have a lot to show and say on a daily basis. If you don’t have something fresh to show, don’t just post for the sake of it! You’ll risk appearing insincere, and that’s not the relationship you’re aiming for.

Do not share other artists’ pages unless there is a specific/relevant reason for so doing e.g. collaborative ventures/people who genuinely inspire you. You want people to see your work and people follow you for your work! You have to have an intention (what it is you want from your Facebook page) and remain true to that intention. Showcasing others takes away from you showing your work to your followers and opens up a whole array of people wanting you to share their work – often of varying relevance and calibre on your page.  It’s harsh but its business, it’s not a free-for-all!

4. PERSONALITY

The downfall of many a page in social media, is if you have the personality of a wet sponge, no matter how awesome your artwork is, you won’t get too far.

How This Artist Earned Nearly 100,000 Facebook Page Fans

Be humorous, without being too rude. Facebook favours slightly cheeky, yet with some humility, rough around the edges, yet possibly good looking (if major surgery were applied) … ohh hang on, that’s me I’m talking about! The main thing is to try and be yourself as much as possible. If your artwork is good, and if you’re a nice person with ambition, you’ll go a long way.

5. BE INSPIRING

As you find your Facebook following growing, it’s because of two things: your artwork is pretty shamazing, and you haven’t be too much of a jerk either.

People do like a success story, so if they see an artist doing well and living their life the way it’s meant to be lived – combining your passion and your work, it can inspire others.

If you appear positive and motivated, it can have the spirit of reciprocity. If you have an off-day your followers can lift your spirits and spur you on.

One last thing: this is by no means meant as an exhaustive list. I’m sure many of you are using Facebook in numerous other clever and creative ways. I know there are many more things I could be doing to have an even better business page, like adding a shop for instance – watch this space! I’m working on new things all the time.

Of course, it’s ever-possible that the powers that be at Facebook could change everything as we know it at the drop of a hat. You have to be ready and prepared to deal with any and all changes – to adapt, to evolve. If and when that happens just see it as an opportunity to do something even better!

Guest artist/author: Tony O’Connor

*****

Thank you Tony. You are a rockstar artist and an inspiration to us all! Thanks for sharing your tips with your fellow artists.

You can find more great tips on Fine Art Tips Facebook Fan Page, on Twitter, Google Plus and on PinterestBe sure and check out and my fine art prints and notecards on Fine Art America.  Or see my art on my website,  LoriMcNee.com.  ~Lori

Originally published on http://finearttips.com

Why Corporate Art Collecting Is Big Business For Artists

$
0
0

Why Corporate Art Collecting Is Big Business For ArtistsPhoto credit : reynermedia Flicker

For as long as anyone can remember, businesses have always invested money in corporate art. In the beginning, this was more of an aesthetic consideration than anything else.

Large companies simply needed artwork to adorn the walls of their boardrooms and reception areas. This is something that has been traced back for hundreds of years with evidence that early banks during the Italian Renaissance were considered to be patrons of the arts with substantial art collections amongst their assets.

Over time, businesses began to view art not only as décor, but also something of a status symbol and began to actively build corporate art collections. It is estimated that in the 1990′s around 50% of  Fortune 500 companies and an additional 2,000 companies across America and Europe were building corporate art collections.

Enhancing the Corporate Image

In many cases, corporate art collections are used as a way to enhance the image that is projected by the company. It is not uncommon for businesses to invest in buying pieces from local artists rather than seeking out masterpieces from the likes of Da Vinci and Dali! This is because it allows the business to place themselves in the role of patron of the arts and gives them the chance to increase their social responsibility ratings.

Not only will the company seek out publicity regarding their collection, but pieces will usually be displayed within the premises so that visitors can see it. When art is properly presented it can create a talking point which opens up a window of opportunity for the company to discuss their involvement in the arts thus further boosting the corporate image.

How Can Artists Capitalize on Corporate Art Collections?

One of the ways that artists can benefit from corporate art collections comes down to money. While more and more of the general population are feeling some form of financial strain which makes it unlikely that they will be able to afford luxury items like art, corporations still have the financial means to invest in it. There is also the additional bonus that when an artist has their work on display in a corporate location there is more chance of them gaining exposure to a wealthier group of potential buyers.

This leads to the question of how to ensure that your art gets noticed by these corporate collectors. In many cases, interior designers and even PR people have a great deal of influence over what is chosen to adorn the walls of any corporate headquarters. Keep in mind that the main goal for the business is to project a certain image. It is a good idea to look at businesses with a local base and see what their company values and ethos are. If you can find one which you think is exemplified by your art then that is probably a good place to begin.

Connect with Interior Designers & PR Firms

It is important to try and make links with interior designers and PR firms as well as companies themselves. One way of doing so is by sending out postcard sized reproductions of some of your pieces, or perhaps by hosting a small exhibition and inviting selected people from these industries. If you do choose to do this then you will need to make sure that your work is properly presented which may mean investing in framing for your work. This needn’t be expensive, you can buy some good quality frames from art suppliers such as www.jacksonsart.com and complete the task yourself. You could potentially host a small exhibition at your studio, but always be sure to present it appropriately.

For those artists who do successfully manage to get noticed by corporate art collectors, the benefits can be fantastic. Not only do you have the chance to sell some of your work, but you will also be getting your art in front of a new audience who may not have seen it before. This can lead to more recognition of your artistic brand.

*****

Guest author: Alison Lansky loves blogging about the topics that are close to her heart. She is also the mother of two fantastic children who like to keep her on her toes!

I’d love to also meet you on Twitterand on Google Plus, Pinterestand join in the fun at Fine Art Tips Facebook Fan Page! Please checkout my art too LoriMcNee.com, or find me on Instagram lorimcneeartist. ~Lori :)

Originally published on http://finearttips.com


Palette Knife Painting Tips

$
0
0

palette knife painting tips

Painting with a palette knife is a challenging, but rewarding approach to paint application.

When applied, the colors make an immediate impact due to their purity. However, the palette knife can be a difficult tool to master because the initial application of paint is so direct and striking.

There is a purity of color that can be achieved when painting with a knife that is very different than with a brush. The “creaminess” of the paint really shows, and the intensity of the color is strong, which is partly due to its layering on the paint surface.

Palette Knife Painting Tips:

  • Try the tapered palette knife, which is strong yet flexible. It allows you to mix the paint thoroughly before applying. palette knife painting tips
  • Squeeze out the colors that you want to mix. For example, Ultramarine Blue and Titanium White, and knead them with the knife until completely mixed. There is no better way to mix colors.
  • The newly mixed  color can then be applied at will. Load-up one flat edge of  the knife and spread out the color to fill an entire area.
  • The larger the knife, the more area coverage.
  • The palette knife is also useful for details and expressive marks, like a tree trunk or branch.

palette knife painting tips

The ultimate benefit of painting with a knife is the ease from which you can change colors. When painting outside in plein air, the drudgery of cleaning a brush in order to use a different color is aggravating, and the brush never gets fully clean. Since I am outside and often working quickly, I don’t like to use too many brushes that would need to be juggled (and inevitably, dropped). The palette knife is simply wiped clean for each color with a good thick rag. This allows more time to be spent on the painting and less on the  preparation.

Guest artist/author: Jonathan Van Brunt has been painting with a palette knife since his days at the Maine College of Art in 1984. You can see more of his works on his blog, Van Brunt Art. 

*****

You can find more great tips on Fine Art Tips Facebook Fan Page, on Twitter, Google Plus and on PinterestBe sure and check out and my fine art prints and notecards on Fine Art America. Check out my website,  LoriMcNee.com.  ~Lori


Originally published on http://finearttips.com

Google Plus Hashtags Explained for Better Engagement

$
0
0

Google Plus Hashtags Explained for Better Engagement

The proper use of Google Plus hashtags will help boost engagement with your friends and following. Google Plus explains that a hashtag is a word or a phrase (without spaces) preceded by the # symbol.

For example, Google Plus hashtags like #Art, #Painting, or #Artists will help people find and join conversations about those particular topics. Clicking on a hashtag will show related content. Artists and other creatives should check out Google Plus for Artists by Paul Stickland, a popular ‘Plusser’.

Be sure and check out the handy guide below filled with tips for using Google Plus hashtags.

Google Plus Hashtag Tips for Better Engagement

[Via: Geeky Stuffs]

Let’s also meet on Google Plus,  Twitter,  Pinterestand join in the fun at Fine Art Tips Facebook Fan Page! Please checkout my art too LoriMcNee.com, or find me on Instagram lorimcneeartist. ~Lori :)


Originally published on http://finearttips.com

How to Boost Creativity in Your Home Office or Studio

$
0
0

How to Boost Creativity in Your Home Office or Studio

photo credit: https://www.flickr.com/photos/bill_lim/1557978846

While you may not always be inspired, the designs, colors and decorations that surround you can help stimulate and boost your creativity.

If you’re an artist of any kind, your workspace should be comfortable—aesthetically pleasing, highly functional and business savvy. Also, privacy is important. Every artist, or writer needs a room of one’s own, as Virginia Woolf famously advised. With a little effort, you can easily design an appealing work environment to bolster your creativity. Here’s how…

Flowers and Greenery

Plants and flowers can literally breathe new life into your office space and evoke feelings of positivity. If you don’t have a green thumb, you can still add a touch of nature to your work area. Modern terrariums, silk flowers, bamboo shoots, or a beautiful orchid can bring character and love to your room.

Wall Art

You’ll probably spend at least eight hours each day working in your home office or studio. Wall art can inspire creativity when you capture images that lift your mood the moment you enter the room. Whether it’s a portrait, city backdrop or painted ocean view, wall art can enliven the ambiance throughout your work space. You can also have the pictures artistically framed to match and complement the colors and shapes within the pieces of art.

Dim the Lights

Research shows that darkness promotes creativity because it brings a sense of freedom from constraints, which lowers inhibition. The study showed that dim lighting sends a visual message that enables the imagination to run free.

Psychologist Elaine Aron, author of “The Highly Sensitive Person,” found that artistic people are more sensitive to light, noise and other stimuli from the environment. Therefore it makes sense that creative people can get their best work done in a dim room free from distractions.

Colors and Shades

The right color scheme can inspire relaxation and creativity. If your work requires significant mental clarity, paint your room a cool shade of blue or sage. To increase calm and a sense of organization, you’ll want to move toward earth-toned accent walls that include chocolate, tan or deep gray. If you’re looking to retain a sense of happiness and energy, upbeat colors of lemon, raspberry or turquoise can bring pleasure.

Personalized Pictures

Pictures of family, pets, and friends can be pleasant reminders that will help keep you motivated and creative throughout your busy day. If you lack wall or desk space, you’ll find digital frames a great way to rotate a lifetime of memories.

Good Energy

A popular technique that many use for inspiration and creativity is feng shui, a Chinese system that supposedly brings well-being to those who live in a harmonious environment. According to this ancient art, you can reap far more business rewards when you place your desk facing the door instead of a window. Whether you believe in the principles of feng shui or not, much of it makes common sense.

Mirrors can be strategically placed to “open up” a room, and irritating noises such as chair squeaks and wobbly tables can be masked with soothing noises of the ocean or rain falling. This practice of setting up your living space to create “good energy” can be utilized with some simple adjustments.

Whether your work space is a sunny studio or set up in a dim, spare bedroom, you will benefit from an inviting setting, filled with your own personal warmth. It’s important to design your home work environment with aesthetic qualities that bring pleasure, inspiring creativity and success.

*****

Guest author: Ashlyn Haldeman is a freelance writer based in Atlanta. She enjoys covering lifestyle topics, especially health, fitness and the arts. She also blogs about legal issues. View her online profile at Google+.

Hope you enjoyed this guest post! Let’s also meet on Google Plus,  Twitter,  Pinterestand join in the fun at Fine Art Tips Facebook Fan Page! Please checkout my art too LoriMcNee.com, or find me on Instagram lorimcneeartist. ~Lori


Originally published on http://finearttips.com

Scientifically Proven Tips for Managing Procrastination

$
0
0

Most likely if you are reading this post, you are procrastinating.

In fact, I am avoiding important work this morning and have been procrastinating by writing this post! Quite often, it is what we need to do that we most feel like avoiding.

Wikipedia defines procrastination as the practice of carrying out less urgent tasks in preference to more urgent ones, or doing more pleasurable things in place of less pleasurable ones, and thus putting off impending tasks to a later time, sometimes to the “last minute” before the deadline.

  Scientifically Proven Tips for Managing Procrastination

“Profit is a by-product of work; happiness is its chief product.” ~Henry Ford

Human motivation is highly influenced by how imminent the reward is perceived to be — meaning, the further away the reward is, the more you discount its value.

Even the most productive and successful people are afflicted with procrastination from time to time. Yet procrastination if not managed, it will take its toll on success and happiness. This short, animated video highlights the helpful Pomodoro Technique for managing procrastination as well as time management.

Remember, “You can’t build a reputation on what you are going to do.”  ~Henry Ford.


Originally published on http://finearttips.com

How to Dramatically Improve Your Art

$
0
0

Blogging and social media have introduced me to many wonderful people, including professional artists and aspiring artists. How to Dramatically Improve Your Art is a guest post by my good Facebook friend, Dougie Hoppes. Dougie loves to paint, he is a student of his craft and has made remarkable artistic improvements within the 5 years we have been conversing. Below are his tips on how to improve your art!

How to Dramatically Improve Your Art

How To Dramatically Improve Your Art

20 hours a week. Painting in oils for 5 years. Not obsessively working all of the time. Not giving up family or friends and working until you can’t see. Not giving up your health to become a fantastic artist. 20 hours a week. Sounds like an infomercial, doesn’t it?

In my mind, how to improve your art is about consistency. It’s about spending time at the easel and actually painting. It’s about addressing your weak points and figuring how to fix them. It’s about taking the occasional workshop or lesson to help get you past any point that you are having issues with. It’s about getting real objective critiques that show you what you are doing right and what could be improved on.

Improving your painting skill is not about spending all of your time reading or watching tutorials. It’s not about surrounding yourself with people who admire everything that you do or surrounding yourself by people who hate everything that you do. It’s not about painting when you feel like it. It’s not about telling people that you are an artist.

It’s about the work. As you can see from the paintings above, there is a huge difference between the two paintings and they were done five years apart…. to the month. At the time that I did the first painting, I was proud of it. It was the best that I could do at that time. The newest painting is another one that I’m proud of. It’s the best that I can right now. Imagine where I’ll be in five more years?

So, how did I get from one state to another? Here’s some basic tips to improve your art:

I spent a lot of time at the easel.

Of all of the methods for improving my work, this, single-handedly, is the most important. How many times have you read something and thought that you understood it? How many times have you forgotten what you read or watched? How many times have you said that “I worked a lot this week” and, in reality, all you did was watch videos?In order for the lessons to stick, you have to spend time at the easel and apply that knowledge that you learned. You have to figure out what holes there are in that knowledge that the book or video didn’t show you. You have to physically do what you have learned.

I kept a monthly log of the paintings and sketches I produced.

One of my most important tricks is to create an image, each month, of all of my paintings and drawings that I created that month. I can see if I’m actually working in a particular month or not. I can see if I’m improving or just reinforcing bad habits.

I took workshops to help me resolve issues that I couldn’t figure out.

Sometimes, the books or videos don’t show you what you don’t know. So, taking a workshop here and there (I don’t recommend more than two a year and I would recommend trying to always go to the same instructor) will help fill in that knowledge. There’s nothing like having hands-on instruction to show you what you are missing and how to fix it.

I read books and watch tutorials on how to improve my techniques.

Yes… I also read books and watch videos. I just don’t confuse them with actual painting time. Most of the time, these are viewed at the end of the night and after I have spent time at the easel. They are valuable and there’s a lot of knowledge that you can get from them. Just don’t confuse this with actually working on your art.

Finding the time to paint.

After spending time with the wife and dogs and my full-time day job, I have about 4 hours of free-time a night, and 10 hours each day on the weekend. That’s a lot of time. However, I need to make sure that I make time for me to do things other than art work. So, doesn’t matter if I can’t draw tonight or tomorrow night. At the end of the week, I know that I should have about 20 hours in. If the week is too busy, at the end of the month, I know that I should have painted for about 80 hours. I want to be a full-time artist. I’m not in a hurry. This approach of consistently working and improving will help me get to my goals.

Guest author/artist: Doug Hoppes  is a Vermont artist, who loves learning and painting the local landscapes. You can find him on Facebook too!

*****

Thank you again Dougie for another helpful guest post,. It has been exciting watching you grow as a painter. And…thank you for continued friendship and support on my FineArtTips Facebook page. ~Lori

*You can find more great tips on Fine Art Tips Facebook Fan Page, on Twitter, Google Plus and on PinterestBe sure and check out and my fine art prints and notecards on Fine Art America. Check out my website,  LoriMcNee.com.  ~Lori

Originally published on http://finearttips.com

On The Go With STRADA Easel

$
0
0

When I’m traveling and on the go I need a painting easel that is sturdy, lightweight, functional, and dependable. That is why I love my STRADA Easel.

I’ve tested most of the popular easels and pochade boxes that are on the market, but this year my trusty STRADA MINI Easel has been traveling with me from coast to coast.

On the Go With Strada Easel

Lori demonstrating at Oil Painters of America National Convention in Bennington, Vermont.

Here’s why I have chosen STRADA Easel:

Sturdy

Whether you pick the full size or mini, STRADA Easels are well built and solid. Made of sturdy aluminum, the STRADA body will withstand rough treatment. Now when I fly, I don’t have concern about my easel being damaged during tough baggage handling.

On the Go With Strada Easel

Note: I suggest buying and extra thumbnut that tightens the panel holder in place. This was not the fault of STRAD, but I backed mine out too far and lost it! You can find a thumbnut at your local hardware store.

Lightweight

At 5’5″ and 115 pounds, I look for an easel that is easy to pack and carry on rugged backcountry trips or while traveling through busy airports.

STRADA offers three backpacks that are perfect for the easels. The large pack was too big for my frame, so I use the middle size Kelty Redwing 40. It has plenty of room for all my art supplies, holds my tripod, and fits either STRADA model.

On the Go With Strada Easel

Lori’s plein air painting on Arches Oil Paper at the Kneeland Gallery Plein Air Event

The STRADA MINI measures 11′”x 7.5″x 1.5″, weighs 2 lbs 9 oz and can hold canvas or board of any size up to a 16″ high with an unlimited canvas width.  The STRADA Easel can accommodate a 1/16″, 1/8″, 1/4″, 1/2″ and 1″ panel thickness

The full-size STRADA measures 15′”x 11″x 1.5″, weighs 4 lbs 3 oz (optional plexiglass palette adds 8oz and brings the total weight of the easel up to 4 lbs 11 oz.) and can hold canvas or board of any size up to a 16″ high with an unlimited canvas width.

Note: To make my traveling even lighter, I bring a pad of Arches Oil Paper. I can cut it to size, and use blue painter’s tape to tack it onto a board. When I return home, I mount the oil paper to a panel and frame. Also, I never leave home without my Cobra Water Mixable Oil Paints.  They are of professional grade pigments, plus they are solvent free and clean up with water! No more turpentine or mineral spirits for me. 

Functional & Dependable

The STRADA Easel design is sleek and ingenious. Created by professional artist, Bryan Mark Taylor, STRADA was designed with his fellow artist in mind. It slides in and out of the backpack

On the Go With Strada Easel

with easy access because it has no protruding parts. Plus, STRADA’s patented self-locking system has streamlined hinges that wont get gummed up by wet paint like many of the other brands.

STRADA is quick and simple to set up. The position control hinges rotate 180 degrees and hold the palette at any angle. For even more efficiency, I added the optional side trays and plexiglass palette.

Whether in the field plein air painting, demonstrating for Royal Talens at the Plein Air Convention, or demonstrating at Oil Painters of America, I can depend on my STRADA Easel to help me look my best! It’s no wonder why so many professional artists are painting with STRADA Easels at art events these days…

On the Go With Strada Easel

Master watercolor artist, James Asher and Master oil painter, Joe Anna Arnett loving their STRADA Easels at our Kneeland Gallery Plein Air Event

Originally published on http://finearttips.com

7 Steps to Create a Huge Landscape Painting

$
0
0

In this demo, American Impressionist Romona Youngquist shares her 7 steps to create a huge landscape  painting.

Romana is one of today’s premier landscape painters. Petite in stature, she is known for her oversized, atmospheric landscape paintings. But don’t let her size fool you, Romona believes the canvas is a ‘war zone’.

7 Steps to Create a Huge Landscape Painting
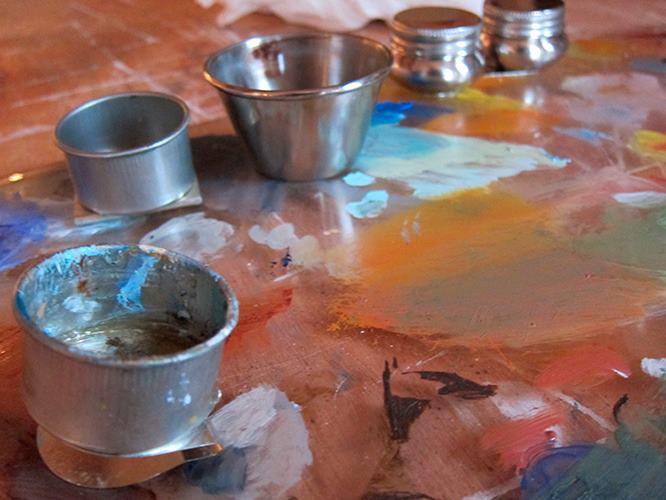
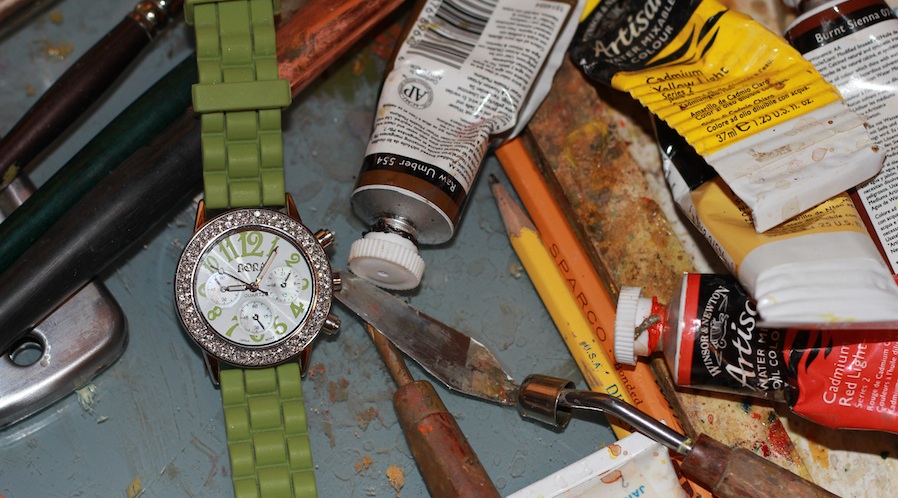
She attacks the painting with her weapons of choice including sandpaper, brush ends, palette knives and rags. The canvas endures many layers of scraping, wiping out and glazing before the battle between woman and canvas is over.

In the end, the viewer is left with an exquisite, mood filled painting that harkens back to simpler days.

Tackle your own big painting with these manageable steps.

Step 1

Before starting a big painting make sure you have a scene you’re excited about.

Work out you scene first with studies, photos, sketches. Mistakes in small paintings are sometimes overlooked but small mistakes in big paintings are magnified.

7 Steps to Create a Huge Landscape Painting

The plein air study

I divide my canvas into a simplified golden section with thirds.X marks the spot of the center of the canvas.
Then decide my horizon line, and my main focal point. Before painting, I ask myself, what do I want to say with this painting? With Poppy Farm, I wanted the quiet drama of a stormy afternoon.

7 Steps to Create a Huge Landscape Painting

Step 2

Start painting the masses with dark abstract shapes with the four basic value planes: To learn more about the 4 Value Planes read the amazing landscape painting book by John F. Carlson.

7 Steps to Create a Huge Landscape Painting

  1. The Sky – the source of light is the lightest.
  2. The Ground Plane – reflects the sky, it is the second lightest.
  3. Slanted Planes – mountains, slanted rocks, hills, etc get less light.
  4. Upright planes – trees, buildings and other upright planes get the least amount of light falling directly on them.

Squint down to see the masses and values. Washes are a simple thinned out transparent red earth and ultra m blue. Now, step back to see whats going on. With a flat brush dipped in thinner, I’ve wiped out the light of the barn and out buildings and defined the shapes of the trees more along with some of the far mountains - remembering to keep it simple and abstract.

Step 3

The Drama starts.

7 Steps to Create a Huge Landscape Painting

Lay in the foreground shadow with a cool green and the warm up a lift greenish yellow closer to the barn. This is where I start to define the trees using a dark rich green underneath with a lighter and warm on top. When I mix my colors, I try to add all the colors I’ll be using on my palette – this will make for a harmonious painting. I start to add color to the barn and foreground. The trees get more dark in the shadows, and lighter on top.

I’ve learned far more from my mistakes than my successes. Happy mistakes are a blessing in disguise. ~Romona Youngquist

Step 4

Thicker paint! The fun part. Then I scrape into the barn tree area my palette knife. and with my big brush. I will frequently deconstruct. I think it makes things more interesting and its fun. I’m keeping the painting soft and simple but also leaving hard edges close to the focal point.

7 Steps to Create a Huge Landscape Painting

Step back and squint

Tip: Use big brushes until the end (except for wiping out the delicate light areas) it really keeps me from poking at the painting which can kill it quick.

Step 5

I’m working color all over the canvas at this point. For the poppies, I see them in a mass and define a few closer to the end and keeping it simple.

7 Steps to Create a Huge Landscape Painting

My paint mixture is getting more opaque and concentrating on values. My paint application is getting thicker but I’ll still scrape and wipeout to soften edges, and then work more paint on top of the scraped areas.

Step 6

Now I’m winding it down. I’m using my smaller flat brushes and palette knife more, adding details. The sky is really simple blocks of dark, medium and light values. I actually remember studying a scene like this in Oklahoma when I was 5 or 6. I noticed how dark the sky was and how it made the tops of the trees glow. And as dark as the clouds are the value of the trees are way darker. This has always fascinated me. I must have been a very strange kid?

7 Steps to Create a Huge Landscape Painting

Tip: Take a pic at this stage and transfer to your iPad. i love to take a break and study what’s going on with the painting. It helps to distant ourself and see what’s working and what isn’t.

Step 6

Coming to the end!

I’ve refined shapes, intensified the focal point, made a few poppies pop but mostly keep them an abstract shape. I’ve pushed thickness of paint, texture, value, contrast and hard edges. After it’s dried I’ll lightly sand and glaze in some warm tones made of transparent red earth. Poppy Farm 48″ x 60″ is done!

Manageable Steps to Create a Huge Landscape Painting

Materials

  • For Poppy farm I’ve used a 48×60 stretched canvas. But love to paint large on
  • Gatorboard panels.
  • Gamblin Paints
  • Tititanum White
  • Cadmium yellow lite
  • Alizarin Crimson
  • Ultra Marine Blue
  • Cad Red Lite
  • transparent earth red
  • using a limited palette make for simpler and harmonious painting.
  • Liquin
  • odorless mineral spirtits
  • 1 in hardware brushes(just buy lots)
  • I use flat hog bristle brushes
  • palette knives
  • rags tissues

*****

Many thanks to my good friend Romona for sharing her inside tips to painting a HUGE landscape painting! Please take a moment to view her wonderful paintings on her website. I hope she has inspired you to give it a try sometime. ~Lori

*You can find more great tips on Fine Art Tips Facebook Fan Page, on Twitter, Google Plus and on PinterestBe sure and check out and my fine art prints and notecards on Fine Art America. Check out my website,  LoriMcNee.com.  ~Lori

Originally published on http://finearttips.com


6 Ways to Create Depth in Your Landscape Painting

$
0
0

Have you ever felt as though you could walk right into a beautiful landscape painting? Like a magician, the artist has transposed the third dimension onto a flat canvas, and you the viewer are lured into a world made of paint.

Creating a believable landscape painting with depth really isn’t some magic trick, it’s technique. For more than a century, skilled artists have used some of the following techniques to carefully orchestrate a convincing landscape painting. Learn how to pull spectators into your landscapes with these tips.

1. Layering and Overlapping

Layering and overlapping is effective when there is a notable contrast in the shade or texture of two overlapping objects. This creates extra contrast and helps to separate the objects from one another. In the dramatic Edgar Payne painting below, the smaller boats in the foreground layer and overlap and partially hide the larger boats. This creates a sense of depth.

6 Ways to Create Depth in Your Landscape Painting


2. The S Curve or Winding Path

A winding river or path that meanders like an S through the painting can be used as a way to move the viewer’s eye. Charles Warren Eaton’s tonal painting, Winter Solitude is an example of this popular technique.

6 Ways to Create Depth in Your Landscape Painting

3. Use Diagonals

The artist Lowell Birge Harrison effectively used diagonals in the composition, Moonrise on the Beach. The gently rolling waves angle away and recede from us, creating s sense of depth and distance.

6 Ways to Create Depth in Your Landscape Painting

4. Aerial Perspective

A faraway mountain range will usually appear lighter, hazier and bluer as it gets further away. This phenomenon is called, aerial perspective. It is an optical effect caused by the atmosphere on objects viewed at a long distance. Use temperature changes in color to help with aerial perspective. This is a generalization, but warm colors are more attention grabbing, therefore they seem to advance more than cool colors which seem to recede. Learn more about this and composition from Edgar Payne.

6 Ways to Create Depth in Your Landscape Painting

5. Foreground Interest

When painting a subject at medium to far distance, it can often appear flat. Include an object of interest in the foreground to enhance the sense of depth. This leads the viewer’s eye into the scene, from the foreground to the subject in the distance. Generally, use less detail, and texture in the background. Renowned artist, teacher and author,  John F. Carlson exemplifies this technique in the following painting.

6 Ways to Create Depth in Your Landscape Painting

6. Changes in Size

In this painting, The Road to Sluis, Holland,  Charles Warren Eaton effectively used the Changes in Size technique. Notice how although in real life we know these trees are the same size, Eaton masterfully crafted them descending away from the viewer. In other words, the trees get smaller as they get further away. The descending trees give a wonderful illusion of depth to this painting.

6 Ways to Create Depth in Your Landscape Painting

As you study great landscape paintings you will discover that many of them employ one or more of the above techniques. I hope this post helps you create believability and depth in your own landscape paintings. Of course, there are exceptions to every ‘rule’ but, you need to know the rules before you break them!

There are other techniques that can be added to this list. Feel free to share your ideas in the comments.

*****

You can find more great tips on Fine Art Tips Facebook Fan Page, on Twitter, Google Plus and on PinterestBe sure and check out and my fine art prints and notecards on Fine Art America. Check out my website,  LoriMcNee.com.  

Originally published on http://finearttips.com

5 Inspirational Quotes to Brighten Your Day

$
0
0

Sometimes an inspirational quote from a friend or a thought leader can help brighten our day, lift our spirits, or reinforce our personal journey.

I love collecting quotes and words or wisdom to share with my readers. Here are a few that jumped off the page at me today. Please feel free to share them with your creative friends. Do you have a favorite inspirational quote? I hope you enjoy these…

5 Inspiring Quotes to Start Your Day

5 Inspiring Quotes to Start Your Day


5 Inspiring Quotes to Start Your Day

5 Inspiring Quotes to Start Your Day

5 Inspiring Quotes to Start Your Day

Let’s also connect on my Fine Art Tips Facebook Fan Page, on Twitter, Google Plus and on PinterestBe sure and check out and my fine art prints and notecards on Fine Art America. Check out my website,  LoriMcNee.com.  ~Lori

Originally published on http://finearttips.com

Left Brain or Right Brain? Take The Quiz

$
0
0

Left Brain or Right Brain? Take The Quiz

Have you ever been accused of being overly analytical or do people say you’re too dreamy? These traits can be attributed to left brain or right brain type thinking.

At the end of this post, take the Alert Scale of Cognitive Style brain quiz to see if you are a left, right or middle brain thinker.

Artists and other creative people tend to be right-brain thinkers. Nevertheless, most our school systems appeal to left brain strategies which are still used in classrooms today.

Right-brain students sometimes leave their school experience feeling inadequate – did you?


Left Brain or Right Brain? Take The Quiz

Each of us has a right, a left or a middle-brain ‘neurological style’ preference in which we view the world. In the late 1960’s psycho-biologist Roger W. Sperry discovered the human brain has two very distinct ways of thinking. Although we have one brain, our brain has two hemispheres that sends messages back and forth to each other.

Typically, dominant left-brain thinkers will be more organized, they’ll watch the clock, and they’ll analyze information and process it sequentially. They are often cautious, and they follow rules and schedules. Left-brain students are strong in math and science, and can answer questions quickly.

  • The right-side of the brain is intuitive and emotional. This hemisphere guides the decisions of the creative thinker that are made throughout the day. Right brainers are very intuitive and have great skill when it comes to seeing through lies or tricks. For instance, they would make great Survivor contestants.
  • The left-side of the brain is sequential, time-oriented and tells one how to think and what to believe and what choice to make. Left-brainers can answer questions quickly, and are strong in math and science. These thinkers make great Jeopardy contestants.
  • The middle-brain of the brain is more flexible than either the right or left. This person might be that uncommon Mathematician/Artist. But when it comes to decision making, middle-brain thinking people sometimes get confused because their brain bounces between the right and left preferences during decision making!  However, these thinkers benefit from logic from the left and intuition from the right. Middle brain oriented people often excel in business, so they might do well on The Apprentice.

Don’t worry, we all use both hemispheres of our brains. But, it is a good idea to exercise and strengthen the weaker side of our brain. Crossword puzzles, research on a desired subject, or listening to a lecture will help stimulate the left side of the brain. The following list will help you understand your own right or left-brain thinking. By understanding the processes at work in our own brains, we can better understand how to enhance our individual choices and studio performance.

Left brain or right brain? Take the Quiz

TRY THIS BRAIN QUIZ BELOW: from The Alert Scale of Cognitive Style, by Dr. Loren D. Crane, Western Michigan University, 1989.

Choose the one sentence that is more true. Do not leave any blanks. Remember, there is no ‘right’ or ‘wrong’ answer to this quiz…

1.  A ) It’s fun to take risks. B ) I have fun without taking risks.

2.  A ) I look for new ways to do old jobs. B ) When one way works well, I don’t change it.

3.  A ) I begin many jobs that I never finish. B ) I finish a job before starting a new one.

4.  A ) I’m not very imaginative in my work. B ) I use my imagination in everything I do.

5.  A ) I can analyze what is going to happen next. B ) I can sense what is going to happen next.

6.  A ) I try to find the one best way to solve a problem. B ) I try to find different answers to problems.

7.  A ) My thinking is like pictures going through my head. B ) My thinking is like words going through my head.

8.  A ) I agree with new ideas before other people do. B ) I question new ideas more than other people do.

9.  A ) Other people don’t understand how I organize things. B ) Other people think I organize well.

10.  A ) I have good self-discipline. B ) I usually act on my feelings.

11.  A ) I plan time for doing my work. B ) I don’t think about the time when I work.

12.  A ) With a hard decision, I choose what I know is right. B ) With a hard decision, I choose what I feel is right.

13.  A ) I do easy things first and important things later. B ) I do the important things first and the easy things later.

14.  A ) Sometimes in a new situation, I have too many ideas. B ) Sometimes in a new situation, I don’t have any ideas.

15.  A ) I question new ideas more than other people do.  B ) I agree with new ideas before other people do.

16.  A ) I have to have a lot of change and variety in my life. B ) I have to have an orderly and well-planned life.

17.  A ) I know I’m right, because I have good reasons. B ) I know I’m right, even without good reasons.

18.  A ) I spread my work evenly over the time I have. B ) I prefer to do my work at the last minute.

19.  A ) I keep everything in a particular place. B ) Where I keep things depends on what I’m doing.

20.  A ) I have to make my own plans. B ) I can follow anyone’s plans.

21.  A ) I am a very flexible and unpredictable person. B ) I am a consistent and stable person.

22. A ) With a new task, I want to find my own way of doing it. B ) With a new task, I want to be told the best way to do it.

To Score: 

  • Give yourself one point for each time you answered “A” for questions: 1, 2, 3, 7, 8, 9, 13, 14, 15, 19, 20, 21.
  • Give yourself one point for each time you answered “B” for questions: 4 ,5, 6, 10, 11, 12, 16, 17, 18.

Add all points. Totals imply:

  • 0-4: strong left brain
  • 5-8: moderate left brain
  • 9-13: middle brain
  • 14-16: moderate right brain
  • 17-21: strong right brain

I hope this information helps you understand what kind of thinker you are. Understanding your own thinking ‘preferences’ can help you be even more productive in the studio. You might also enjoy reading about ideas on how artists can improve their work habits.

***Thanks for visiting FineArtTips.com. You can meet me on my social media sites > Fine Art Tips Facebook Fan Page, on Twitter, Google Plus and on PinterestBe sure and check out and my fine art prints and notecards on Fine Art America.  Or see my art on my website,  LoriMcNee.com.  ~Lori

Originally published on http://finearttips.com

Tabletop Artist Palettes by New Wave Art

$
0
0

Tabletop Artist Palettes by New Wave Art

Once again, my friends at New Wave Art have asked me to try out their latest product design. This time I am reviewing their new POSH tabletop artist palettes.

It always feels like Christmas whenever I open up a new box of palettes from New Wave Art. First of all, I’d like to say that I am so impressed with the quality and craftsmanship of anything produced by the New Wave Art family. All of their products are topnotch quality, and the POSH tabletop palettes are everything the name implies.

New Wave Art takes pride in every aspect of their presentation, from the packaging to the product itself. The POSH tabletop palettes use beautiful furniture grade maple wood that has been hand sanded, and hand finished by Amish craftsmen.

Lori McNee of FineArtTips.com

I love my New Wave palettes!

I first tested the grey toned palette. I was very impressed with the nonporous surface which is nonabsorbent, plus the grey tone made color mixing very easy. Although I use Cobra’s solvent-free oils, I am told that these palettes are resistant to standard artist solvents and mediums. They are easy to clean, but I would avoid using a razor blade for scraping paint because it will dig into the beautiful finish. I easily cleaned my POSH with a palette knife, rubbing alcohol and a VIVA paper towel.

POSH is also available with a beautiful natural stain surface which is finished like the handheld palettes. All POSH palettes come outfitted with custom silicone footings for superb traction on any surface and of course they are proudly made in the USA. In addition, the warp resistant wood provides an ideal surface in the studio or outdoors.Tabletop Artist Palettes by New Wave Art

Whether you choose a POSH or a wooden New Wave handheld palette, I know you will feel appreciate the timeless quality of these products. For me, working in my studio with New Wave palettes makes my painting experience even more enjoyable! ~Lori

*****

Be sure and say hello to me on Twitterand on Google Plus, Pinterestand join in the fun at Fine Art Tips Facebook Fan Page! Please checkout my art too LoriMcNee.com, or find me on Instagram  ~Lori


Originally published on http://finearttips.com

Creative Ways to Showcase & Sell Art Online and Off

$
0
0

Whether you intend to sell art online or not, displaying your artwork in the right way will enhance the beauty of your paintings and entice people to look at them. Here are some creative suggestions you can make use of while displaying your artwork online and off.

lori mcnee encaustic art

An example of a cohesive display of Lori’s encaustic paintings at Kneeland Gallery

Displaying Artwork at a Gallery

The way you display your artwork at an art gallery will affect the way people perceive it. The paintings you choose to exhibit must be cohesive with one another. It is helpful to showcase paintings of the same theme or design.

If you have large paintings that are of the same theme, you can hang them up in a grid pattern covering an entire wall. This will create a dramatic effect when viewed from a distance. If the paintings aren’t very large, it is best to hang them all at eye level so that people can find it easy to view them.

Don’t limit your imagination to just walls when it comes to displaying your artwork. If there is a wall mounted shelf at the gallery, you can use it to display paintings that are small in size.

Consider using stand-alone panels or screens to display your paintings on. These can be painted in vivid colors to give a different look to your paintings. To maximize your display space, you can hang paintings on both sides of the screen. Be sure to have adequate light focusing on the screens or panels.

bella muse gallery

Bella Muse Gallery elegantly displays art on the walls, on small tabletop easels, and on moveable panels/display walls.

Displaying Artwork at a Fair

When displaying your paintings at an open-air art or craft show, you may need to invest in a tent that will keep your artwork safe from the elements. Make sure the tent is good enough to stand firm in case it gets too windy.

Easy to make display easels

For art prints or unframed paintings, set up folding tables and place baskets on them to display your art. You can suspend hooks from the frames of the tent or use a pegboard frame with S hooks to hang your paintings.
Remember that you will have limited space to display your art so do not over-crowd the place. People who come into your booth should be able to move around freely.

Make a statement by showcasing a single, large painting on a display easel. You can set up the easel in a corner of the booth or outside the booth to attract customers. A-frame boards will also make passers-by take notice of your work. Display structures should serve the purpose of supporting your paintings in the right way and drawing people to look at your paintings.

When displaying artwork at a fair, make sure the pieces you sell are ready-to-display or hang. This will give incentive to purchase your artwork.

Displaying Artwork Online

Indeed the best way for collectors to buy art would be in person. But a lot of people have taken to purchasing art online. Selling art online is a lot more difficult than selling it in person. It is important to have a professional website to tell your story and showcase your artwork so you can sell art online. Yes, your own website! Hosting your artwork on free art websites will not look professional. Click this link to learn how to start your own blog or website in minutes!

Make sure to use high-quality pictures of your artwork. Instead of only uploading close-up images of the paintings, upload ones that show how the painting will look when hung in a bedroom or a living room. Make sure the images don’t take too much time to load.

Include information about yourself on your website. Write a short bio and artist’s statement about what connects you to art, your favorite art style, or anything that people can relate to. Describe all the paintings that you display on your website. Build up interest by describing paintings that you are working on.

Remember to not use heavy jargon for art description. Many people are interested in art but that doesn’t mean they may be familiar with the terms you are familiar with. Stick to simple descriptions that the majority can connect with.

Displaying Artwork on the Go

When artists tell others about their profession, they are often faced with questions related to their style of painting, the medium they work on, or what interests them. As with limiting your use of artistic jargon on your website, stick to simple words and explanations when you converse with a non-artist.

Instead of getting into a lengthy conversation, give them a little peek into your world. Get business cards printed with your basic details. The business card should also showcase one of your best works. You will have to choose one that will look just as great in a miniature version. You can opt to have different designs printed on the business cards.

Better still, you can photograph your best works and compile a photo book. It needn’t be large in size. Crop images so that they fit into a book or album that you can carry around easily. You can also save digital files onto your mobile device and show that album to people who are interested in your artwork.

Keep in mind, whatever way you decide to showcase your paintings, just make sure the display doesn’t overshadow your artwork. Exquisite display structures or extravagant websites may take away the simple charm that your paintings exude.

*****

Guest author: Sophia Mann is a Facebook friend of FineArtTips on FB. You can see her website at http://www.plentyofpaintings.com/

*Many thanks for visiting FineArtTips.com. You can meet me on my social media sites > Fine Art Tips Facebook Fan Page, on Twitter, Google Plus and on PinterestBe sure and check out and my fine art prints and notecards on Fine Art America.  Or see my art on my website,  LoriMcNee.com.  ~Lori

Originally published on http://finearttips.com

Viewing all 273 articles
Browse latest View live